Friday, August 29, 2008

Breakfast Pizza

It PIZZA night at our house. Friday nights I like to have pizza, either frozen or if I'm feeling spunky we'll make pizza. And since we've got a leftover Boboli crust I think we'll make the pizza this week.
I've always loved breakfast foods, and when Red Baron came out with their quick fix biscuit style breakfast scrambles I fell in love. They're so yummy and fill you up. The only problem is they're a bit expensive. So I'm going to solve that problem by making my own!

This is a meal in itself so no menu for the night.

Not "Barren" Breakfast Pizza

Ingredients:
1 Boboli pizza crust
1 lb ground breakfast sausage
6 eggs
1 pkg of mixed cheese
milk
flour
butter
salt & pepper

Preheat the oven to 450'


  1. Heat large skillet to medium high. Add the ground sausage and cook until fully cooked.
  2. Remove sausage from skillet with a slotted spoon, allowing the grease to remain in skillet.
  3. If you need more grease/butter add a few tbsp of butter. We're making a roux so that we can make our gravy. Gradually add a tbsp of flour and mix. Your flour-grease mixture should look like peanut butter, so gradually keep working to get that consistency.
  4. After you've achieved your "peanut butter" slowly add 1 cup of milk to the skillet, using a whisk, stir the milk in. Keep adding milk 1 cup at a time until you've gotten a smooth gravy consistency. You might want to make it thicker than you usually prefer since it will be the sauce on your pizza.
  5. Salt & pepper your gravy to taste.
  6. Add the sausage back into the skillet.
  7. Place the pizza crust on a baking sheet and bake for about 5 minutes, this will harden the crust up so you don't end up with soggy pizza.
  8. After crust has harden remove from oven and set aside.
  9. Scramble your eggs, adding salt & pepper to taste. Add a splash of milk and a handful of cheese.
  10. With a fresh skillet, cook your scrambled eggs.
  11. When done remove them from heat and drop handfuls of egg on the pizza crust, leaving at least a 1 inch border.
  12. Next spoon your sausage and gravy on top of the eggs and crust, leaving the same 1 inch border.
  13. Finally generously layer cheese on top of the gravy and eggs. You want the cheese to form a nice top layer barrier.
  14. Place in oven and back for 15 to 20 minutes, or until cheese has melted and the gravy is bubbly.
  15. Remove from oven and allow plenty of time to cool!

Photo courtesy of CookingLight.com

Wednesday, August 27, 2008

Wild Berry Pancakes

I was scanning through some of the entries for the Pioneer Woman's cooking challenge and came across this yummy recipe for wild berry pancakes and I knew I had to try them. For starters my family LOVES pancakes, I think monster (my son) could eat them and waffles for every meal. I think it has something to do with the syrup though. Anyways I had a bag of frozen mixed berries leftover and have been trying to figure out how to use them other than my famous mixed berry cobbler. So this seemed like the perfect way. I have to thank Bethany for this yummy breakfast bounty. Since I'm working late all this week, I'm going to go ahead and make these Wednesday night and then hubby and monster can just reheat them Thursday night.

Menu: Wild Berry Pancakes and maple sausage patties

Wild Berry Pancakes

Ingredients:
3 C. whole milk (you could probably use 2% or even skim as a substitute, but WHY?)
3 Tbs. lemon juice
2 C. all-purpose flour
2 tsp. baking powder
1 tsp. baking soda
½ tsp. fine sea salt
3 Tbs. sugar
2 large eggs, lightly beaten
4 Tbs. unsalted butter, melted
A splash of vanilla
1 ½ C. mixed wild berries, fresh or frozen


  1. Combine milk with lemon juice in a medium-sized mixing bowl and let sit.
  2. Whisk together the dry ingredients in a large mixing bowl.
  3. Mix eggs, melted butter, and vanilla with the milk.
  4. Preheat griddle over medium-low heat and lightly butter.
  5. Add liquid ingredients to dry ones and whisk lightly just until combined (batter should still be lumpy).
  6. Pour batter onto pre-heated griddle to desired pancake size and sprinkle top with berries.
  7. When bubbles rise to the surface, flip pancake and cook 1 or 2 minutes longer until golden brown.
  8. Serve warm with powdered sugar.
Maple Sausage Patties: I love frozen sausage patties, so easy so simple. Throw them straight into the skillet from the freezer. Cook until they're done, remove from the skillet and drain the grease. Now throw them back into the hot skillet and drizzle with mayple syrup. Let it soak into the patties.

Plate your pancakes and patties. Make sure to have an ice cold glass of milk ready and waiting 'cause you'll need something to cut the sweet stickiness of this sweet-tooth fixer.

Photo courtesy of taylorkoa22

Tuesday, August 26, 2008

Kid Friendly - Sloppy Joe's

I originally tried this recipe out from Cooking Light, and it was so yummy. But I thought it was a bit time consuming. Instead of making this sauce from scratch it would be much simpler, although not as healthy, I could just use store-bought sauce. So that's what I end up doing the majority of the time. Again since it's all about reheating for the hubby, I'll be making the meat mixture Tuesday night.

Menu: Sloppy Joe's, oven fries and cottage cheese

Kid Friendly Sloppy Joe's

Ingredients:
1 can of sloppy joe sauce
1 can of corn
1 small white onion
1 green bell pepper
1 to 2 lbs of ground beef (or venison)
4 hamburger buns


  1. Heat oil in a large nonstick skillet over medium-high heat. Add onion, bell pepper, and garlic; sauté 3 minutes.
  2. Add meat to pan; cook 5 minutes or until browned, stirring to crumble. Stir in sloppy joe sauce.
  3. Reduce heat, and simmer 12 minutes or until thickened, stirring occasionally. Stir in corn; cook for 2 minutes or until thoroughly heated.
  4. Spoon about 1 cup meat mixture on bottom half of each hamburger bun; cover with top half of each bun.
Oven Fries: I'd suggest preparing these first and then letting them cook while you get the sloppy joe's ready. Pre-heat your oven to around 425 to 450. Take 4 large baking potatoes and cut into medium thick wedges. Place wedges on a baking sheet and drizzle with EVOO, sprinkle with some chili powder and salt. Cook for about 20 minutes or until they are nice and crispy. Remember you want them all to sit flat on the sheet, don't overload the sheet or they're steam and not crisp. Once they're done, remove from oven and sprinkle with salt.

Now your fries and sandwiches are done so plate them up, add a dollop of cottage cheese sprinkled with salt & pepper and you've got a scrumptious sloppy supper!

Picture from CookingLight.com

"There's a spirit....."

Can you feel it? Oh I'm so excited football season is just around the corner! Oh how I've missed you. The clashing of the pads, the roar of the crowd, the sound of leather hitting bare hands at unimaginable speeds. Just thinking about it is sending chills down my spine. I imagine most of my readers are women, and prolly don't feel the rush of excitement like I do when it comes to football but just in case you do here's a little something to get you pumped up for opening weekend. And of course it has to be for my beloved Aggies! Whoop!


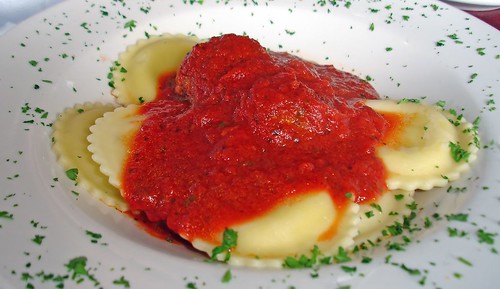
Smoked Mozzarella Raviolis

This meal should be super easy since all I have to do is heat and serve! Well ok let me rephrase that, all hubby has to do is heat and serve. Then I'll re-heat and eat myself.

Menu: Smoked Mozzarella Ravioli's w/Giada's Homemade Marinara Sauce, side salad and crunchy garlic bread.

Smoked Mozzarella Ravioli's with
Giada's Homemade Marinara Sauce

Ingredients:
Frozen Ravioli's
Giada's Marinara Sauce (that we made last night)


  1. Bring a large pot to boil, carefully add the ravioli's and bring the heat down. Don't want to boil to roughly.
  2. After the pasta is cooked drain and return to pot with a drizzle of EVOO, so it doesn't stick.
  3. Heat the sauce up in the microwave, times will vary according to your settings.
  4. Plate the pasta and spoon just enough sauce over top. Sprinkle with parmesan cheese and some parsley.
Side Salad: While the pasta is cooking get your salad together. Open a bag of romain lettuce (that's what I like), add some chopped tomatoes, maybe some onion or olives. Some feta cheese? A cucumber maybe? Mix well and dress with your favorite dressing.

Pop in the loaf of frozen garlic bread while the pasta is cooking and you're prepping your salad.

Crunchy bread, cool lettuce and warm gooey raviolis, what else could be better than this. Man I'm so hungry I could eat the whole pot!

Monday, August 25, 2008

Giada's Homemade Marinara Sauce

I found some great smoke mozzarella ravioli's at our local farmers market and I knew I couldn't just put my regular old Ragu spaghetti sauce on something so yummy. So I'm being adventurous and going to make a homemade sauce. We'll be eating the ravioli's on Tuesday night but in an effort to conserve time I'll be making the sauce Monday night.

Giada's Homemade Marinara Sauce

Ingredients:
1/2 cup extra-virgin olive oil
2 small onions, finely chopped
2 garlic cloves, finely chopped
2 stalks celery, finely chopped
2 carrots, peeled and finely chopped
1/2 teaspoon sea salt
1/2 teaspoon freshly ground black pepper
2 (32-ounce) cans crushed tomatoes
2 dried bay leaves


  1. In a large casserole pot, heat the oil over a medium-high flame.

  2. Add the onions and garlic and saute until the onions are translucent, about 10 minutes.

  3. Add the celery, carrots, and 1/2 teaspoon of each salt and pepper. Saute until all the vegetables are soft, about 10 minutes.

  4. Add the tomatoes and bay leaves, and simmer uncovered over low heat until the sauce thickens, about 1 hour.

  5. Remove and discard the bay leaf. Season the sauce with more salt and pepper, to taste. (The sauce can be made 1 day ahead.

  6. Cool, then cover and refrigerate. Rewarm over medium heat before using.)

Menu Planning Monday - August 25th

Last week's menu got a bit shuffled around. I ended up having to work late all last week, and will be doing the same again this week. So that meant anything that actually had to be cooked or prepared the night of dinner didn't happen. The hubby was all about fast food for him and monster, which was good for the crockpot recipes, well kinda. My Red Chile Pork Tacos didn't happen because the meat got left in the crockpot longer than was supposed to since I wasn't there to take it out after work. So its a good thing my mom had met me for lunch and brought a container full of yummy green beans, potato and ham soup. So Tuesday's dinner was the soup and when I got home I did a quick salvage of the pork roast.

Red Chile Pork Salvage
Shred the pork, mix up as many eggs as you have on hand. Boil and then fry some potato slices along with a handful of onion. Fry the pork, eggs, potatoes and onion all up. Salt & Pepper to taste then throw on a handful of cheese. Mix together. Grab some flour tortillas and fill with the mixture. Add some salsa & sour cream. Pork & Potato Tacos! Yummy. We had these Wednesday night, I pre-made the tacos so all the hubby had to do was throw them in the microwave.

This meant the rest of the week got shuffled around as well. The lasagna was moved to Thursday night and we skipped the BBQ Chicken Sandwiches. Pizza was still on Friday. I had an interview on Saturday so we did oatmeal for breakfast instead and had leftovers for dinner. Sunday we did the grilled chicken and I went ahead and made a yummy favorite, Mixed Berry Cobbler.

So this week's planning will be easy quick fixes since I have to work late again. For more menus check out the Organized Junkie!


Monday
Dinner: Hubby didn't eat the chicken from last night so he will be eating leftovers. I'll be fending for myself.


Tuesday
Dinner: Smoked Mozzarella Raviolis with Giada's homemade marinara sauce, side salad and garlic bread

I went the our local farmer's market last Saturday and found a great vendor who makes homemade pastas. I had to try them out, they're frozen so it'll be easy and because I'm feeling spontaneous I'll be trying to make a homemade sauce.

Photo courtesy of Cory Coffman


Wednesday
Dinner: Sloppy Joes with oven fries & cottage cheese

Serve a meal that reheats beautifully and is guaranteed to have kids crowding around the dinner table. Corn kernels add a dash of color and texture for a playful spin on this tried-and-true classic.

Photo Courtesy of CookingLight.com


Thursday
Dinner: Breakfast for Dinner! Wild Berry Pancakes and maple sausage patties

I saw this recipe on the Pioneer Woman's Dairy Contest and I immediately knew I had to try it, it looks so yummy. And what's better is I still have half a bag of frozen mixed berries to use up.

Photo courtesy of taylorkoa22


Friday
Dinner: Breakfast for Dinner! Not "Barren" Breakfast Pizza

I absolutely love Red Baron's Biscuit Style Scrambles, but they're a little expensive and you only get 2 to a box, which honestly is never enough. So I'm taking their idea and making my own. I've got leftover pizza crust to use up as well.

Photo courtesy of CookingLight.com


Saturday
Breakfast: Cereal
Lunch: Sandwiches
Dinner: Spaghetti with meatballs, ceasar salad and garlic bread

Sunday
Breakfast: White Rice with toast & jelly
Lunch: Sandwiches
Dinner: TBD

And as always here is your shopping list. It should be pretty short because we're using leftover items.

August 25th Shopping List

And stay turned for the recipes to be posted bright & early each morning, or the night before.


Wednesday, August 20, 2008

Honey Chipotle BBQ Chicken Sandwiches

With summer winding down the time for backyard barbeques is running out but with this yummy meal you can savor the summer even in the dead of winter. Oh but who are we kidding, its still 90 plus degrees outside and here in Texas we've still got plenty of time. So go ahead and pour a glass of ice cold tea to wash this summer favorite down.

Menu: Honey Chipotle BBQ Chicken Sandwiches, Green Bean & New Potato Salad, corn on the cob, and of course ice cold sweet tea

Honey Chipotle BBQ Chicken Sandwiches

Ingredients:
1/2 cup water
1 teaspoon ground cumin
4 garlic cloves, thinly sliced
1 pound skinless, boneless chicken breast
1 (7-ounce) can chipotle chiles in adobo sauce
1 tablespoon canola oil
1 tablespoon minced garlic
1 teaspoon ground cumin
1/2 cup canned tomato puree
1/4 cup cider vinegar
3 tablespoons honey
1 tablespoon Worcestershire sauce
1/4 teaspoon salt
4 (1 1/2-ounce) sandwich rolls
2 ounces Monterey Jack cheese, thinly sliced
4 (1/8-inch-thick) slices red onion


  1. Ok our changes start at the very beginning. Instead of doing this in a saucepan dump it all in the crockpot, then move to step 2 after about an hour. Combine water, 1 teaspoon cumin, 4 sliced garlic cloves, and chicken in a large saucepan. Cover and bring to a boil over medium-high heat. Reduce heat to medium-low; cook 10 minutes or until chicken is done. Drain, and place chicken on a cutting board. Cut chicken across grain into thin slices; keep warm.
  2. Remove 2 tablespoons adobo sauce from can; set aside. Remove 2 chipotle chiles from can; finely chop and set aside. Reserve remaining chiles and adobo sauce for another use.

  3. Heat oil in a large nonstick skillet over medium-high heat. Add 1 tablespoon minced garlic; sauté 3 minutes or until just beginning to brown. Add 1 teaspoon cumin; sauté 1 minute. Ok here's the second change, now dump the sauted spices in the crockpot and then continue to dump remainder of ingredients in making sure to stir well. Stir in tomato puree; cook 4 minutes or until mixture thickens to a pastelike consistency, stirring constantly. Stir in reserved 2 tablespoons adobo sauce, 2 chopped chipotle chiles, vinegar, honey, Worcestershire, and 1/4 teaspoon salt. Add sliced chicken to sauce; simmer for 3 minutes or until thoroughly heated. You want to allow the chicken to cook in the pot for about 3 hours after this, your time might vary but you want a nice thick bbq sauce. Don't let it get dry or pasty.

  4. After chicken has cooked, take it out and slice it up, then return to crockpot and mix with sauce again.
  5. Preheat broiler.

  6. Split rolls in half; arrange in a single layer, cut sides up, on a baking sheet. Broil 1 minute or until lightly toasted. Remove top halves of rolls from baking sheet. Divide chicken mixture evenly among bottom halves of rolls, and top chicken mixture evenly with cheese. Broil chicken-topped rolls 2 minutes or until cheese melts. Remove from oven; top with onion and top roll halves. Serve immediately.


Green Bean and New Potato Salad

To streamline the preparation of this salad, cook the potatoes and green beans in the same pot of simmering water. The beans take less time, so add them to the pot after the cooked potatoes are scooped out. You can combine the mayonnaise dressing and store it in the refrigerator overnight. Toss with the potatoes and remaining ingredients just before serving.


Ingredients:
  • 1 1/2 pounds small red potatoes
  • 2 cups (1-inch) cut green beans (about 3/4 pound)
  • 2/3 cup low-fat mayonnaise
  • 2 tablespoons whole-grain Dijon mustard
  • 2 tablespoons rice vinegar
  • 1 tablespoon fresh lime juice
  • 1 teaspoon honey
  • 1/8 teaspoon freshly ground black pepper
  • Dash of salt
  • 1 garlic clove, minced
  • 1/2 cup finely chopped red onion
  • 1/4 cup chopped fresh basil

  1. Place potatoes in a large saucepan; cover with water. Bring to a boil. (I'd cook the corn on the cob at this time too) Reduce heat; simmer 20 minutes or until tender. Remove potatoes with a slotted spoon; place on a cutting board. Let cool to room temperature. Add beans to simmering potato cooking water; cook 3 minutes or until crisp-tender. Drain; let cool slightly. Cut potatoes into quarters.
  2. Combine mayonnaise and next 7 ingredients (through garlic) in a large bowl, stirring with a whisk. Add potatoes, beans, onion, and basil; toss gently to combine.

Now everything is ready and I know you're just dying to take that first big bite, but be sure to pour that ice tea 'cause you might need it after you gobble up this spicy sandwich.


My Favorite Things: Part 4

What is it with women and money? I like to think I used to know how to handle my money, at least I did when there was enough coming in to match what was going out. I grew up working, had my own checking account, when I went to college I got a credit card. Still working and handling my own finances but somewhere along the way I guess I just never really got it. Never had that ah-ha moment where I said "What am I doing, I understand now that I can't keep going like this". I never saved, ok let me rephrase that I never saved more than enough other than to buy something extravegant like a pair of $200 jeans or a new multi-disc cd player for my truck. But I guess at some point you grow up, you get a real job and you start to think about things.

My first real job out of college, I was living with my parents, had no expenses and had lots of disposible income. Obviously I had alot of money to throw away because I decided hey look I'm going to be a financially smart working woman and open up a Roth IRA, this was in addition to my workplace IRA. So where did this little bug that whispered these great ideas come from? Well honestly it was partially my mom, (a great business minded woman), Oprah ('cause she's great inspiration) and the name behind woman power Suze Orman.

Now I'll admit alot of the times she's kind of overbearing, maybe a little hokey and just plain crazy. But bottom line she's got her crap together and she understands our way of thinking. As a wife and a new mommy, I totally understand how important the things she "preaches" about are now. And its hard emotionally to choose to do some of the things for yourself over the innate desire to care for others but I know that by choosing to take care of myself, I can better care for others. I'm not going to say that everything she says is spot on, like with any advice you have to tailor it to your situation but I believe the overall objective works for everyone.

That said I have to put Suz Orman and her financial planning books as my favorite things. And because I believe all women should at least read her advice, even if you don't follow it, I'm posting one of her most recent books. This book was originally available on the Oprah website, of which I'm not sure if it's still there.

Mexican Lasagna

Pastor Ryan's Mexican Lasagna

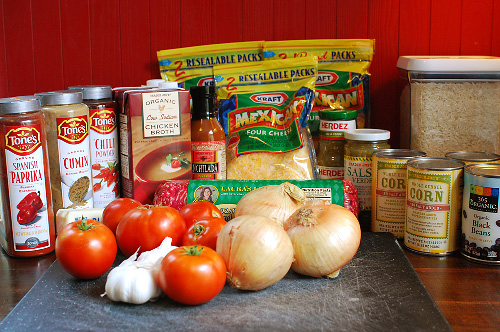
This recipe is amazing and again, you just can't go wrong with mexican food in our house. My hubby jokes that if its got tortillas, meat, cheese and (usually cream of mushroom soup) its a WIN. Well this recipe doesn't have cream of mushroom soup but it scored big points. Since this recipe came courtesy of the Pioneer Woman's Pastor Ryan, I'm going to redirect you to the blog posting with great step-by-step directions with pictures. Now remember I have already cut our quantities in half so try not to get confused.


Ingredients:

Paprika, Cumin, and Chili Powder to make up your own “Taco Seasoning”

1 box of chicken broth
1 can of salsa verde
1 can of enchilada sauce
3 tomatoes
1 1/2 white onions
1 head of garlic
1 bag of mexican blend cheese
6 flour tortillas
1 to 2 lbs ground beef (we have an overstock of venison so we used that instead)
2 cups uncooked white rice

Now here are your directions...... MEXICAN LASAGNA

Monday, August 18, 2008

Red Chile Pork Tacos

At my house you can never go wrong with tacos, or nachos or how 'bout anything mexican or TexMex. I guess its only natural with us living in Texas and so close to great authentic flavors. And these tacos are a favorite, there's something about the spicy yet sweet pork and the crunchy taco shells. Its making my mouth water just thinking about it! I'm changing up the directions a little bit because as you know we've been in a crazy heat wave and I don't dare use my oven. So everything's going in the crockpot.

Menu: Red Chile Pork Tacos, fruit salsa and black beans(go ahead throw in a frozen margarita, I promise not to tell)

Red Chile Pork Tacos with Caramelized Onions

Ingredients:
1 tablespoon ancho chile powder
1 teaspoon brown sugar
1/2 teaspoon salt
1 pound pork tenderloin, trimmed
Cooking spray
1 teaspoon vegetable oil
3 cups thinly sliced onion
8 hard taco shells
1/2 cup chopped tomato
8 teaspoons chopped green onions


  1. Preheat oven to 425°. Or set your crockpot to low.
  2. Combine first 3 ingredients; rub evenly over pork. Here's where I'm changing it, throw it in the crockpot for about 8 to 10 hours, you know the drill. Place pork on a broiler pan coated with cooking spray. Bake at 425° for 20 minutes or until a thermometer registers 160° (slightly pink). Remove pork from oven; let sit 5 minutes before slicing. If you're preparing the night before, just pop in the fridge and when you're ready for dinner reheat and continue to step 3.

  3. While pork cooks, heat oil in a large nonstick skillet coated with cooking spray over medium heat. Add onion; cover and cook 10 minutes or until golden brown, stirring frequently. Uncover and cook 1 minute, stirring constantly.

  4. Fill each taco shell with about 2 ounces pork, 3 tablespoons sautéed onion, 1 tablespoon tomato, and 1 teaspoon green onions.


Now I'm not a banana fan, actually can't stand the smell or taste of them but my hubby and son love them with a passion and they both need to eat more fruits and veggies so this one's for them.

Fruit salsa: Combine 2 cups sliced banana, 1/2 cup diced pineapple, 1/4 cup chopped cilantro, 1 teaspoon brown sugar, 1/4 teaspoon salt, and 2 diced seeded jalapeño peppers in a large bowl; toss gently.

Because I won't eat the salsa I throw together a 2nd side dish. Open up a can ob black beans and drain them. Dice up a red bell pepper and a jalapeno. Add a few handfuls of them to the beans and heat them up. After warming the beans, put a dollop of sour cream and there you go.

Grab a plate of tacos, add your side dish and go to town.

Recipe and picture courtesy of my favorite website CookingLight.com

Crockpot Vegetable Minestrone

I like to make Monday dinners ahead of time because we all know how hectic Monday mornings are and by the time 5 o'clock rolls around I'm beat and don't want to deal with cooking. So last night I whipped this little goody up, well actually all I did was open and pour, open and pour, open and pour, ok you get the picture.

Menu: Crockpot Vegetable Minestrone and garlic bread sticks

Crockpot Vegetable Minestrone

Ingredients:
1 bag of frozen mixed vegetables or you can do what I did and use up all the leftover bags of various veggies in you freezer, I had corn, peas and carrots. I added a can of lima beans also.
1 can of diced tomatoes
1 box of beef broth
1 packet of onion soup mix
2 cups of pasta shells


  1. Set your crockpot to a quick time like 4 to 6 hours because this really doesn't need to cook, you're just warming everything up.
  2. Pour your frozen veggies, tomatoes (juice and all), beef broth and soup mix in the crockpot. Stir together and allow to cook.
  3. 45 minutes prior to serving, add your pasta. Keep a close eye on your pasta shells, you don't want them to overcook.
  4. When you're ready to serve pop the frozen bread sticks in the oven for about 8 minutes. When they're crispy, serve with your soup.
Super easy, simple supper. If you want you could even add some ground hamburger to make this even more hearty and filling.

Menu Planning Monday - August 18th

What's the secret to my success in the kitchen, ha yeah right success, well at least sanity? It's menu planning and I'm teaming up with Organized Junkie and will start sharing my weekly menus. Usually I try to do 2 to 4 week menus since I like to only go to the grocery store once every 2 weeks and then Sam's Club once every few months, but I digress. Menu planning helps save money time, and most of all my relationship with the hubby. If I menu plan, I know what's for dinner and can get it on the table in no time flat with little interference or killing my hubby because I'm usually in a bad mood by the time I make it home 'cause I'm starving. So for our inaugural menu planning Monday here's the menu...


Monday
Dinner: Crockpot Vegetable Minestrone and garlic bread sticks

Tuesday
Dinner: Red Chile Pork Tacos, fruit salsa and black beans

Sweet, succulent onions are the perfect foil for this savory pork taco filling. Ancho chile powder gives the meat a mild, slightly fruity chile flavor.

Its another great recipe from Cooking Light only instead of using the oven we'll be using the crockpot.


Wednesday
Dinner: Mexican Lasagna

Something to keep in mind is that this is an extremely flexible recipe. You can add or omit ingredients to your taste and whatever you do, this “Lasagna” will surely be amazing. I’m using a full-sized pan for this (something that will feed 20+ people) so keep that in mind and cut the recipe in half if you’re just using a regular casserole dish. Be on the look out for quantities such as “some”, “A few”, or “A good bit of”…just remember, this is flexible. Don’t stick too closely to my exact recipe. Make it all your own.

This recipe comes from The Pioneer Woman's guest recipe blogger Pastor Ryan. It looks super simple and yummy.


Thursday
Dinner: Honey Chipotle BBQ Chicken Sandwiches, potato salad and corn on the cob

This recipe yields slow-cooked barbecue flavor in less than an hour. The sandwiches need to be broiled at the last minute, but the rest of the menu can be made ahead of time.

Its another great recipe from Cooking Light only instead of using the oven we'll be using the crockpot.


Friday
Dinner: It's Pizza Night! Store bought pizza and salad.

It's Friday night and I never feel like cooking so I try to pop in a store bought pizza and put together a bag of pre-made salad. Its easy and the dishes are minimal. This allows me to catch up on any cleaning and/or keep the kitchen clean for the weekend. I like DiGiorno or California Pizza Kitchen (later only on a splurge) but any brand you like best will work.


Saturday
Breakfast: Mixed Berry Pancakes and sausage patties
Lunch: Sandwiches
Dinner: Grilled Chicken, stovetop stuffing and brussel sprouts


Sunday
Breakfast: Biscuits and jelly, scrambled eggs
Lunch: leftovers
Dinner: Spaghetti, ceasar salad and garlic bread

So now here's your shopping list for the week...

August 18th Shopping List

Now stay tuned for each day's recipe. I promise they will be posted bright and early each morning, or if they need to cook overnight I will post no later than 9 PM the night prior.

Friday, August 15, 2008

D.I.Y Friday - Photo Letter Frames

10/2/08 FYI: I fixed the broken link to the shared pictures, guess all the action crashed the link so I'm hosting it elsewhere!

Inventive, Distinctive & Personalized by You!
(and an easy DIY project!)


You've seen them in model homes, designer dream showcases and on the Oprah show. They're gorgeous and a true conversation piece. Letter Perspectives is the creator and it is the gift you give to someone who has everything, but only if you can afford to drop $150 as a starting price. OR, yes there's an or, you can DIY it for a fraction of the cost.

Begin with your idea, what do you want you frame to
say? It could be your last name, it could be the traditional things like HOPE, FAITH, LOVE, FAMILY, it could be KITCHEN, or do a sports theme for BASKETBALL. Whatever you get the point. I chose to do WELCOME, so that I could put it in the entry hall.


You can either take the pictures yourself or you can use the work of others. Sites like Flickr allow you to save photos for free (as it was pointed out, let me make it clear you can save photos for free for your own personal viewing pleasure, professional photographers who post on Flickr typically have a setting so they can't be downloaded and/or watermarked images) or you can subscribe to sites like iStockphoto, for a minimal charge and download professional images. So start searching for images, things related to the style you want to use. So if your word is KITCHEN, look for images of things like utensils or spices. If your word is BASKETBALL, look for images like nets, balls, bleachers, hoops or courts. I've got a great start with the help of a friend (Gatorhightowers) for you here. So once you've gotten some great images you might have to do a little photo-shopping on them to get your desired letter.

Then just upload your letters to a photo print site like shutterfly or snapfish, where you can print 4x6 or 5x7 prints for as little as .15 cents.

Once you get your letters in it's time to start shopping for a frame. If you choose an uncommon number of slots, say a 7 4x6's frame is going to be difficult to find pre-made. However you can look for a frame that will match your dimensions and have a matt made for usually under $30. My suggestion would be to watch the flyers for a 50% off coupon and use it to buy your odd sized frame. That is how I was able to purchase a $50 frame for $25. Which brought my frame costs to only $35.00. Much better than $150!

Thursday, August 14, 2008

BBQ Chicken Pizza

Thank the heavens there's a break in the 100 degree temperatures! I can finally use my oven and stove again. To celebrate this glorious occasion I plan on fixing a super yummy pizza. This recipe goes way back to my college days of experiment cooking. I found this recipe and of course what college student doesn't love pizza, so I had to try it. My roomies were thoroughly impressed and so was I. Everyone I make this pizza for can't believe that it doesn't have any bbq sauce in it and neither will your taste buds.

Menu: BBQ Chicken Pizza, corn on the cob, and a yummy glass of white wine/Chardonnay.

BBQ Chicken Pizza

Ingredients:
1 (10-ounce) Italian cheese-flavored thin pizza crust (such as Boboli)
3/4 cup tomato chutney
2 cups chopped roasted skinless, boneless chicken breasts (about 2 breasts)
2/3 cup diced plum tomato
3/4 cup (3 ounces) shredded extra-sharp white cheddar cheese
1/3 cup chopped green onions


  1. Preheat oven to 450°.
  2. Place crust on a baking sheet. Bake at 450° for 3 minutes. Remove from oven; spread chutney over crust, leaving a 1/2-inch border. If you're using your own chutney be sure to drain the juice from the tomatoes as you place them on the crust, otherwise you'll end up with soggy crust.

  3. Top chutney with chicken. Sprinkle diced tomato, cheese, and green onions evenly over chicken. Bake at 450° for 9 minutes or until cheese melts. Cut pizza into 6 wedges.


Note: If you can't find tomato chutney, make your own. And I highly suggest that you choose this option. Combine 2 cups diced plum tomato, 3 tablespoons brown sugar, 3 tablespoons cider vinegar, 1/8 teaspoon Jamaicañ jerk seasoning, and 1 minced garlic clove in a small saucepan; bring to a boil. Reduce heat to medium; cook 20 minutes or until thickened.

Serve with your corn on the cob and you've turned pizza night into a dinner grown ups and kids alike will love.


Recipe and picture courtesy of my favorite website CookingLight.com

Wednesday, August 13, 2008

My Favorite Things: Part 3

I'm sure by now you have realized that I love Cooking Light recipes, if you haven't what planet have you been on? I'm not sure when I first found Cooking Light but I do know it was way before they had a website that you could access all of their recipes from. I think I've been a subscriber of the magazine for at least a good 10 years and let me tell you their recipes are some of the best I've ever tasted. I'd say within the last 5 years have they opened up their recipes to the internet user and I'm sooooo thankful. Now I don't have to go digging around my stacks of books looking for a recipe I know I saw in one of the summer issues.

Cooking Light has been on the frontier of low fat, low calorie, eat your veggies and love 'em cooking. Their recipes are unique, inventive and all around great. They have been able to take some of your favorite full fat dishes and rewrite the book on them. I believe about a year ago they partnered up and their website now gives you access to a variety of other magazines, like Southern Living, recipes as well. They have great features for grilling, quick & easy meals, party planning and you have the ability to store all of your favorite recipes on their website, this includes their recipes and your own.

One of my favorite features is a daily email that highlights their "Dinner Tonight" meal. Each day they email a complete menu plan that is quick, easy and always super yummy. This makes menu planning a snap because you can grab 5 to 10 of these "Dinner Tonight" meals and you've got every night planned.

You really have to check them out, you've already seen some of their amazing recipes on my blog so what are you waiting for? Just look for the link on My Favorite Thing section.

Monday, August 11, 2008

Maple Glazed Salmon

I'm feeling fishy! Let me preface this with the fact that I have only recently became a fish eater. Oh I'd gladly eat tuna fish out of the can, yes its very yummy and a great way to lose weight. Oh and I'd eat swordfish because lets be honest, it tastes like steak when grilled. And call me strange but I could eat my weight in sushi. I think it had to do with the fact that raw fish just doesn't taste fishy. But no not until the last year have I became a fan of fish. Now I can't eat a large variety of fish but I'm loving salmon and so I've started fixing more salmon dishes lately. And one of my favorite is this quick fix meal. I can't wait for dinner tonight!

Menu: Maple Glazed Salmon, Scrumptious Sweet Potatoes and Orange Zest Broccoli

Maple Glazed Salmon

Ingredients:
2 teaspoons paprika
1 teaspoon chili powder
1 teaspoon ground ancho chile powder
1/2 teaspoon ground cumin
1/2 teaspoon brown sugar
1 teaspoon sea or kosher salt
4 (6-ounce) salmon fillets
Cooking spray
1 teaspoon maple syrup


  1. Prepare grill, heating to medium.
  2. Combine first 5 ingredients. Sprinkle fish with salt; rub with paprika mixture.

  3. Place fish on grill rack coated with cooking spray; grill 7 minutes. Drizzle fish with syrup; grill 1 minute or until fish flakes easily when tested with a fork.

Scrumptious Sweet Potatoes
I usually like to buy the prepackage sweet potatoes, you know the kind that are wrapped up in plastic. They have the microwave directions on the side and only take 5 minutes to cook. So I suggest looking for these at your grocery store, otherwise bake your sweet potatoes in the oven.

While the potatoes are baking combine a few tbsps of butter with brown sugar and chopped pecans, you could even throw in a pinch of cinnamon, nutmeg and chili powder. After the potatoes are done, split them open and drop a tbsp of your butter mixture in and let the ooey gooey goodness melt all over them.

Broccoli
Another quick fix convenience, I buy the steam-fresh packages of frozen broccoli. Pop it in the microwave and out comes perfectly steamed broccoli. But to dress it up, while its steaming, I take an orange and get some yummy zest. Put the zest aside and then cut the orange in half. After the broccoli has steamed put it in a big bowl, add the juice of 1 half orange and the zest. Mix it up and you're ready to go.

Now everything is ready to go so plate and serve!

Recipe and picture courtesy of my favorite website CookingLight.com

Fancy Duds Potatoes

In an effort to get creative and well I really want to win this cooking contest where I could win a giftcard, see SITS Girls Logo for contest details. I'm going to play around with one of my family's favorite recipes. Now a little history....

In my junior year of college I thought I'd play house and doing some cooking. My roommate and I had a great little duplex with a huge kitchen, I had a boyfriend that I wanted to show off for and I wanted to prove to my parents that I really was a big girl making it on my own. So what did I do? I hosted Easter dinner at my house. I ordered a ham from Honey Baked Ham, 'cause lets be honest I didn't know the first thing about cooking a ham, and ham is a staple for Easter. After that I searched for some great side dish recipes. Somehow someway I found this amazing recipe. After a few tweaks to make it my own and a little bit healthier, I call it my...

Three Cheese Gourmet Scalloped Potatoes
  • 1 large clove garlic -- minced
  • 1 shallot -- minced
  • 3 tablespoons melted butter
  • 1 1/4 cups milk
  • 1 1/2 cups plain yogurt (sour cream works too)
  • 1/2 teaspoon salt
  • 1/4 teaspoon pepper
  • 2 1/2 pounds red potatoes -- sliced 1/8" thick
  • 3 ounces Gruyere cheese -- grated
  • 1 ounce Swiss cheese -- grated
  • 1/4 cup Parmesan cheese -- grated
  1. Saute first 3 ingredients for 2 minutes.
  2. In a separate bowl whip together the milk and yogurt. You may need to add more milk depending on the consistency. Your yogurt should dissolve into the milk and the milk mixture should be the consistency of cream. Salt and pepper the mixture and add to the saute pan.
  3. Add potatoes and bring to a boil over medium heat.
  4. Transfer 1/2 of the potatoes to 9x12-inch casserole dish.
  5. Add 1/2 of the Gruyere cheese and 1/2 of the Swiss cheese.
  6. Transfer remainder of potatoes and carefully pour milk mixture into the dish.
  7. Add remainder of Gruyere and Swiss cheeses and top with Parmesan cheese.
  8. Bake at 350F for 45 minutes. Let stand 20-30 minutes before serving.

I quickly added it to the menu, among other things that I can't remember because this dish outdid everything else on the table! And quickly because a requested dish at our table every year, it became famous at my office pot luck and has quickly grown into my signature dish that I bake for others.

Unfortunately you just have to imagine what this yummy recipe looks like because my camera sucks and if I posted a picture of this ooey gooey goodie well let's be honest it wouldn't be so appetizing.

Sunday, August 10, 2008

Mama's Crockpot Meatloaf

I have a great meatloaf recipe that I love to make, its so yummy my mouth's drooling just thinking about it but of course since I'm trying to stay out of the kitchen that recipe would not be the best thing to make right now. Instead I decided to experiment, I've never made meatloaf in the crockpot, well and honestly I've never made traditional meatloaf. I always either do meatloaf stuffed peppers or my sun-dried tomato turkey meatloaf. So this was most definitely going to be interesting. Googling meatloaf brought up a million different recipes but non seemed to match exactly what I had in mind so I combined a few and here's what I came up with.

Menu: Mama's Crockpot Meatloaf, roasted garlic mashed potatoes, green beans and a tall glass of milk.

Mama's Crockpot Meatloaf

Ingredients:
1 lb of ground beef
1 lb of ground pork
2 1/2 cups of breadcrumbs (make your own or store bought)
1 chopped green bell pepper
1 small yellow onion, chopped
2 eggs
2 tbsp of worchestershire sauce
1 tbsp of ketchup
2 tbsp of milk
salt & pepper to taste

Line your crockpot with 2 strips of aluminum foil (needs this to get the loaf out) and set the time on low, either 8 or 10 hours depending on your needs.

  1. In a medium bowl combine your breadcrumbs and milk, allow to soak for 5 minutes.
  2. Combine the beef and pork, making sure to mix well so that you don't have any beef/pork sections.
  3. Combine the meat, breadcrumbs and next 5 ingredients. Add salt and pepper to taste.
  4. Shape the mixture into a loaf and place in crockpot.
  5. Generously cover with extra ketchup.
  6. Cook until done, you may need to drain the juice from the crockpot about half way through the cooking.
Now I like my meatloaf to have a crisp crust and I found that this was not achieved when done in the crockpot so just prior to serving I placed the loaf on a sheet pan, set the oven to 400 degrees and baked it for about 15 minutes.

While the meatloaf was crisping I prepared a package of instant mashed potatoes and heated up a can of green beans. When all was done, just plate and serve.

There's nothing like a home cooked meal of meatloaf, my son kept making yum yum faces and grunting while eating this so according to him it's delicious!

Friday, August 8, 2008

Apron Strings

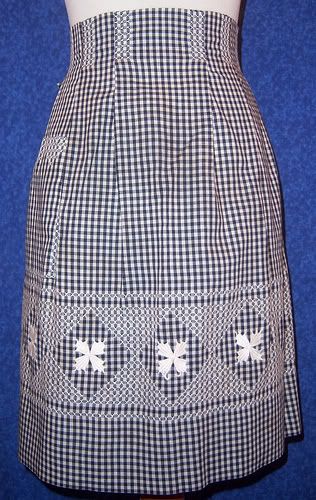
Never did I think the day would come when I understood the necessity of aprons. Oh I remember watching all the classic tv shows where the women wore aprons and played Susie Homemaker. I remember thinking, now why do they wear those things, I don't see the purpose and surely that's the reason they went out of style. I mean I grew up never seeing my mom in an apron and she was most definitely an 80's Susie Homemaker of a stay-at-home-mom. So alas my thoughts were they were just a fashion trend something that came and went like hoop skirts, corsets, poodle skirts, bell bottoms and jordash jeans. Flash foward to 2008 and for the first time in my life I understand why those women wore and NEEDED aprons! It's like a lightbulb went off. Oh and it's not just because I'm doing more cooking, no I've always cooked. It's because now I understand that when you have a child following you around in the kitchen, while you dredge the roast in flour, that child will get into something they shouldn't and there's no time to find the towel from the sink to wipe your hands before you grab said child. It's a necessity to have that apron on your waist so as you run to grab your little monster, you can quickly wipe your hands and snatch him up without getting flour all over your nice black work pants or your child.

Now since I have only just seen the light, I don't actually own an apron and have had to resort to wear a kitchen towel tucked into the waist of my pants. But that is most definitely going to change because I have found some really cute aprons that I'm falling in love with, if only I could decide which to get.

Rick Rack Attack, a really cute online store has authentic vintage aprons with the classic rick rack ribbon.

Sommer Designs, was recently featured on the Pioneer Woman's blog, and has modern fashionable hostess style aprons.


Carolyn's Kitchen, has your "sex-kitten" style aprons that will be sure to make your husbands swoon. I'm thinking I might have to get one of these for a naughty night when our little monster goes to grandma's house.


And of course the mother of all handmade trading/selling sites, Etsy has a multitude of sellers displaying aprons.

Oh so many to choose from, I might just have to get a few. If aprons are like towels they'll get dirty and I just have to have one for everyday right? ;)

Light King Ranch Chicken

After the sun went down last night I decided to whip up a casserole for dinner tonight. Since its been so crazy hot the idea that I'd have to use the oven to bake this delightful dish really put a downer on my plans until I decided to go ahead and make it the night before. This way I kept cool in the kitchen while making this and tonight all we have to do is pop it in the microwave!

I think my husband could love me for this dish and this dish alone. I seriously have to put it under lock and key to keep him from eating it all in the first 30 minutes of its life. I did wake up this morning to find that the casserole, mind you for tonight's dinner, well only half of it survived the night. (Husband's been working the night shift at home) Trust me when I say this meal won't last long, so you'd better grab your fork and protect your plate when this baby hits the table!

Menu: Light King Ranch Chicken, "kick it up a notch" salad, and big glass of lemonade.

Light King Ranch Chicken

Ingredients:
1 large onion, chopped
1 large green bell pepper, chopped
Vegetable cooking spray
2 cups chopped cooked chicken breasts
1 (10-ounce) can fat-free cream of chicken soup, undiluted
1 (10-ounce) can fat-free cream of mushroom soup, undiluted
1 (10-ounce) can diced tomato and green chiles
1 teaspoon chili powder
1/2 teaspoon pepper
1/4 teaspoon garlic powder
12 (6-inch) corn tortillas
1 (8-ounce) block reduced-fat Cheddar cheese, shredded


  1. Sauté onion and bell pepper in a large skillet coated with cooking spray over medium-high heat 5 minutes or until tender.
  2. Stir in chicken and next 6 ingredients; remove from heat.

  3. Tear tortillas into 1-inch pieces; layer one-third tortilla pieces in bottom of a 13- x 9-inch baking dish coated with cooking spray. Top with one-third chicken mixture and one-third cheese. Repeat layers twice.

  4. Bake at 350° for 30 to 35 minutes or until bubbly.

Allow plenty of time to cool off 'cause nothing is worse than getting burned by scalding cheese. So while it's cooling mix up that cool crisp salad. Here's what I like to use:

romaine lettuce
hopped tomatoes
sliced red onions
sliced cucumber
1 cup of canned corn
1 cup of drained & rinsed black beans
avocado (if you've got one)
Spicy Ranch Dressing (add a few splashes of tasbasco sauce or mix salsa in)

Viola, your salad is done and the casserole is cool so grab a plate and dig in!

Note: Freeze casserole up to 1 month, if desired. Thaw in refrigerator overnight, and bake as directed.

Recipe and picture courtesy of my favorite website CookingLight.com

Thursday, August 7, 2008

Chipotle Pulled-Pork Sandwiches

Oh the dog days of summer in Texas and I have a new found love affair with my crockpot. I used to think crockpot cooking was only for winter where warm soups and roasts were just the thing to take the chill away but THINK AGAIN! With a 2 week run of 100 plus degree temperatures and my poor a/c cranking up every 5 minutes, I dread the idea of even turning the light on in the kitchen. So this week out came the crockpot again, we're best friends now. During the fall I usually make this meal on the stove per the directions but I thought I'd give my new best friend a crack at it, and sure enough it turned out even better than on the stove. The meat was so tender and just fell apart.

Menu: Chipotle Pulled-Pork BBQ Sandwiches, coleslaw and your choice of ice cold beer.

Chipotle Pulled-Pork BBQ Sandwiches

Ingredients:
1 (7-ounce) can chipotle chiles in adobo sauce
1/4 cup barbecue sauce
1 teaspoon garlic powder
1 1/2 teaspoons ground cumin
1 (1-pound) pork tenderloin, trimmed and cut into 1/2-inch cubes
1 (14.5-ounce) can diced tomatoes, undrained
1 tablespoon olive oil
3 cups thinly sliced onion
2 teaspoons chopped fresh thyme
1 teaspoon sugar
6 (1/2-ounce) slices provolone cheese
12 sandwich-cut bread-and-butter pickles
6 (2 1/2-ounce) Kaiser rolls


  1. Remove 1 chile from can; reserve remaining chiles and sauce for another use. Finely chop chile. (If you like it spicy, use another or two, which come on bbq is supposed to be spicy right)
  2. (Ok this is where the directions call for a saucepan but instead just throw the meat in and then cover it with the rest of the ingredients. ) Place chopped chile, barbecue sauce, and the next 4 ingredients (barbecue sauce through tomatoes) in a medium saucepan; bring to a boil over medium-high heat. Cover, reduce heat, and simmer 45 minutes, stirring occasionally. Uncover and cook 10 minutes or until sauce thickens and pork is very tender. Remove from heat. Remove pork from sauce; shred pork. Return pork to sauce. (Since we cooked it in the crockpot no need to remove the pork, just take two forks and shred it in the crockpot and then give it a good mix)

  3. Heat oil in a large nonstick skillet over medium-high heat. Add the onion, thyme, and sugar; cook 10 minutes or until golden, stirring occasionally.

  4. Heat a large nonstick skillet (or your panini maker) over medium heat. Place 1 cheese slice, 1/2 cup pork mixture, about 2 tablespoons onions, and 2 pickle slices on bottom half of each roll. Cover with top halves of rolls. Add 3 sandwiches to pan. Place a cast-iron or heavy skillet on top of sandwiches, and press gently to flatten. Cook 2 minutes on each side or until cheese melts and bread is toasted (leave cast-iron skillet on sandwiches while they cook). Repeat procedure with remaining sandwiches.

Doesn't this just make your mouth water! Now grab a bag of dress and serve coleslaw, mix it up and plate next to your ooey goey sandwich.

Now an important note, choose your bbq sauce wisely as this can make or break your sandwiches, you want to make sure it's not too sugary tasting because it'll be overkill with the pickles, too spicy itself and you'll be dying with the chipotle, not too smokey either because that's what the chipotle is for. I'd suggest a nice mild to medium flavor bbq sauce with a hint of kick whether its name brand or a local specialty.

Recipe and picture courtesy of my favorite website CookingLight.com

Wednesday, August 6, 2008

My Favorite Things: Part 2

Paciugo Gelato (pronounced Pah-choo-go) is a gelateria artigianale, producing small batches of gelato containing no cream and no added preservatives. Paciugo Gelato is made daily according to recipes created in Turin, Italy and by utilizing the latest Italian technology without compromising the traditional nature of the product.

Only the finest ingredients are used to produce Paciugo Gelato, including fresh fruit, fresh pasteurized homogenized milk and the highest quality imported chocolate and nuts. Paciugo Gelato is produced daily in a variety of flavors chosen from over 200 recipes that will tantalize your tongue and turn you on to this Italian classic.

With 70% less fat than traditional ice cream and served in micro-bowls your figure will thank you as well. Started in Dallas in 2000 their 20 stores can now be found through the country and their 1st international store located in Mexico City. You can visit them in store or they do delivery stations for parties or corporate events.


Bare Escentuals, also known as bareMinerals, is an amazing makeup system that I have fallen in love with.

Bare Escentuals uses only the finest ingredients in their products. Made with crushed minerals from the earth, 100% pure bareMinerals:

  • is free of preservatives, talc, oil, fragrance and other potential skin irritants
  • is free of fillers and binders
  • is weightless
  • provides adjustable coverage—from light to full
  • will improve the condition of the skin over time
True to their slogan, "makeup so pure you can sleep in it", I sleep in it every night and rarely have a breakout. All ages and skin types can benefit from bareMinerals—especially those concerned with skin sensitivities, allergies, scars, blemishes, rosacea, wrinkles and pigmentation. (of which I have super sensitive skin, allergies and mild rosacea) The foundation provides impeccable coverage for every skin type and skin tone, and also protects with a natural SPF 15 broad spectrum UVA/UVB protection. bareMinerals SPF 15 Foundation carries the Skin Cancer Foundation Seal of Recommendation.

The dual shades of foundation powder provide the best coverage for a changing skin color throughout the seasons from summer to winter, you never have adjust you foundation for a tan. Simple and light it provides full coverage without that yucky heavy feeling.

Starter kits can be purchased at a variety of b&m stores such as Sephora or online through their website.

Friday, August 1, 2008

Travel Tips

I'd like to say I could plan a vacation and then relax on that vacation but honestly that's not my personality type. I admit it I'm OCD and proud of it, I mean we've all got our quirks right? At least mine isn't the stinky, gross, or type that can hurt people. So when I plan a trip, something I do quite often. I like to plan trips and daydream of traveling to places I'm sure we'll never go to because of time or finances but at least a girl can dream, and a girl with ocd can plan! I've got planned vacations to Alaska, Las Vegas, Disneyworld, Italy, Hawaii, Mackinaw Island, Seattle... anyways that's here nor there. I posted earlier about finally getting to take a vacation getaway Big Cedar Resort outside of Branson Missouri and I thought I'd share some of my tips for planning vacations. (Trust me I've got our 3 days planned out for every hour.)

Starting Points
Whenever I start to plan a vacation I always check out the top two travel guide sites to get advice as to their recommended activities, restaurants, hotels and itineraries.

 span class=

 span class=


Hotels
After I check out those sites I hop on over to the
best forum in the world for learning how to bid and break into Priceline and Hotwire. They have each state broken down into their own section as well as areas for top travel sites. Here you can research the going rates for bidding on hotels, see the amenities legends for hotels and learn the star ratings based on city zones. The community members are helpful and can aid you in scoring great hotels for deep discounts.

BetterBidding.com

 span class=I usually end up doing a little research on the rates and what hotels are available and then get great hotel reviews.This site is extremely helpful because you get real customer reviews and pictures of the hotels. It lists the going rate (usually from places like Priceline) as well, so you can compare the rates from what people are getting through BetterBidding vs standard deals.

After doing this research I hit up all the well know travel deal sites, Priceline, Hotwire, Orbitz, Hotels.com, Travelocity, and Expedia. Search for my hotels or destination and compare the prices.


Flights & Rental Cars
If we need a rental car I quickly look up the current rates at my preferred company and then head over to another great forum, especially if you have frequent flyer points/miles. They have a great section for rental car discount codes to use when renting a vehicle.
Again if we're driving and after we've scored a great deal on a rental car I check this great resource for gas cost estimates from AAA.


Attractions & Activities

Once the flight, car, and hotel have been secured, I'm free to start googling activities and restaurants. While many hotels have preferred vendors or affiliations with restaurants and can offer discount pricing, I have found that more often than not you can score better deals for activities outside of your hotel's concierge or resort. I would recommend starting with your destination's town website, tourism website or chamber of commerce website. From there find out your desired activity, google the activity and location for local providers.


Food
For great food finds I recommend checking out the experts advice. The foodnetwork and the travel channel are great resources for top notch restaurants as well as finding cheap eats.

Shows like $40 a day; Giada's Weekend Getaways; Diners, Drive-ins and Dives; Have fork will travel; Rachel Ray's Tasty Travels; Rachael's Vacation; Road Tasted; and Roker on the Road all serve up a great resource for fabulous food fare at your destination.


The travel channel serves as an excellent guide for cuisine with their shows Food Paradise and Taste of America. But their advice doesn't just pertain to shows, true to their name they are one of the most knowledgeable sites regarding all aspects of travel. So be sure to check out their guides , ideas and forums.


So now you have your flight, car, hotel, activities and food. You're all set and ready to hit the ground running on a well planned, every detail secured, ocd kind of girl's vacation. Now's the time to hit the mall to pick up some great vacation clothes and accessories!