Showing posts with label tomato. Show all posts

Friday, September 26, 2008

Chicago Style Pizza

Fridays always feel so hectic, why is that? Anyways because they seem so hectic and I'm always usually beat by the time they come around so I lean on the family staple that Friday night means pizza night. Now about half the time I'll stick with a good frozen standby but occasionally I like to do one from scratch especially if its quick and simple. Let me tell you, this one fits the bill. You can vary this recipe up anyway you like whether it be tame or flaming and feisty but regardless its a great HEALTHY pizza that all will enjoy.

Menu
: Chicago Style Pizza and caesar salad (go on I won't tell grab a beer too!)

Chicago Style Pizza

Ingredients:
2 (10-ounce) cans refrigerated pizza crust dough
Cooking spray
3/4 cup (3 ounces) shredded part-skim mozzarella cheese
1 1/4 cups cooked Atsa Spicy Pizza Sausage
3 tablespoons thinly sliced fresh basil
1 (14.5-ounce) can no-salt-added diced tomatoes, drained
1/2 cup (2 ounces) grated fresh Parmesan cheese
1/8 teaspoon black pepper

Preheat oven to 450°.


  1. Unroll dough portions onto a large baking sheet coated with cooking spray, slightly overlapping the edges. Pinch edges together to seal. Pat the dough into a 15 x 12-inch rectangle.
  2. Sprinkle mozzarella cheese over dough, leaving a 1/2-inch border, and top with sausage, basil, and tomatoes.
  3. Sprinkle with Parmesan cheese and pepper.
  4. Bake at 450° for 2 minutes.
  5. Reduce oven temperature to 425° (do not remove pizza from oven), and bake an additional 12 minutes or until cheese melts.
Recipe and photo courtesy of CookingLight

Tuesday, August 26, 2008

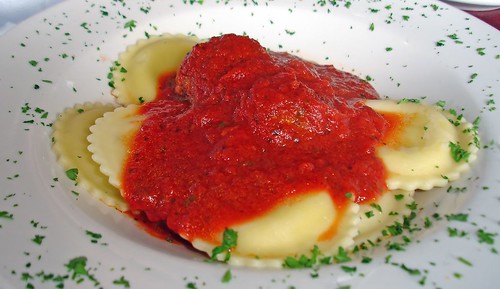
Smoked Mozzarella Raviolis

This meal should be super easy since all I have to do is heat and serve! Well ok let me rephrase that, all hubby has to do is heat and serve. Then I'll re-heat and eat myself.

Menu: Smoked Mozzarella Ravioli's w/Giada's Homemade Marinara Sauce, side salad and crunchy garlic bread.

Smoked Mozzarella Ravioli's with
Giada's Homemade Marinara Sauce

Ingredients:
Frozen Ravioli's
Giada's Marinara Sauce (that we made last night)


  1. Bring a large pot to boil, carefully add the ravioli's and bring the heat down. Don't want to boil to roughly.
  2. After the pasta is cooked drain and return to pot with a drizzle of EVOO, so it doesn't stick.
  3. Heat the sauce up in the microwave, times will vary according to your settings.
  4. Plate the pasta and spoon just enough sauce over top. Sprinkle with parmesan cheese and some parsley.
Side Salad: While the pasta is cooking get your salad together. Open a bag of romain lettuce (that's what I like), add some chopped tomatoes, maybe some onion or olives. Some feta cheese? A cucumber maybe? Mix well and dress with your favorite dressing.

Pop in the loaf of frozen garlic bread while the pasta is cooking and you're prepping your salad.

Crunchy bread, cool lettuce and warm gooey raviolis, what else could be better than this. Man I'm so hungry I could eat the whole pot!

Monday, August 18, 2008

Crockpot Vegetable Minestrone

I like to make Monday dinners ahead of time because we all know how hectic Monday mornings are and by the time 5 o'clock rolls around I'm beat and don't want to deal with cooking. So last night I whipped this little goody up, well actually all I did was open and pour, open and pour, open and pour, ok you get the picture.

Menu: Crockpot Vegetable Minestrone and garlic bread sticks

Crockpot Vegetable Minestrone

Ingredients:
1 bag of frozen mixed vegetables or you can do what I did and use up all the leftover bags of various veggies in you freezer, I had corn, peas and carrots. I added a can of lima beans also.
1 can of diced tomatoes
1 box of beef broth
1 packet of onion soup mix
2 cups of pasta shells


  1. Set your crockpot to a quick time like 4 to 6 hours because this really doesn't need to cook, you're just warming everything up.
  2. Pour your frozen veggies, tomatoes (juice and all), beef broth and soup mix in the crockpot. Stir together and allow to cook.
  3. 45 minutes prior to serving, add your pasta. Keep a close eye on your pasta shells, you don't want them to overcook.
  4. When you're ready to serve pop the frozen bread sticks in the oven for about 8 minutes. When they're crispy, serve with your soup.
Super easy, simple supper. If you want you could even add some ground hamburger to make this even more hearty and filling.

Monday, July 28, 2008

Pepper Steak

This recipe comes from the best book for budget friendly, not so figure friendly but beginner's guide to cooking cookbook "Where's Mom Now That I Need Her". I started out with the intention of following the recipe to a t, Pork Chops & Rice. However after defrosting 2 sets of wild pork chops (again my great hubby) I realized they had been in the freezer too long and had severe freezer burn so scratch that. Quickly found some round steak (venison thanks to the hubby) in the freezer and made a quick change to the recipe. I had only bought 1 green bell pepper so it was going to be a variation on traditional pepper steak.

Crockpot Pepper Steak & Rice

Ingredients:
  • 1 lb of round steak
  • 2 tbsp of chopped green bell pepper
  • 2 tbsp of white or yellow onion
  • 1 can of stewed tomatoes
  • 2 tbsp of cooking oil (I use EVOO)
  • 1 cup of rice (I used brown)
  • 1/2 cup of flour
  • salt & pepper to taste

Set crockpot to low, either 8 or 10 hours depending your time needs

  1. Take steak and place between 2 sheets of ceran wrap and pound vigerously until meat is very thin. Doesn't that feel good, go on get all your frustrations out. Dang dog, dang husband, stupid clothes that don't fit anymore! Omit this step if your meat has already been prepared this way, though I'd suggest doing it yourself since its lots of fun.
  2. Mix flour, salt and pepper in a shallow dish. Coat steaks in flour and place on bottom of crockpot.
  3. Next chop your onion and bell pepper and add to crockpot.
  4. Add rice and open can of tomatoes pouring on top of rice. Add the evoo and cover.
  5. Occasionally check and stir mixture together.
  6. Once rice has been cooked to your desired texture, plate and serve.